


Renting an apartment or a house can be a daunting process, especially when it involves a significant amount of money just to move in. Some renters fear they may never see this deposit again. However, with the right steps and precautions, you can make sure you get your full deposit back when you move out. This guide will provide you with all the information and tips to help you navigate this process successfully.
Understanding the Purpose of a Deposit
Before diving into the steps to secure your deposit refund, it’s critical to understand what a deposit is and why landlords require it. When you rent a property, your landlord or property management company will typically require a security deposit. This deposit acts as a safety net for landlords, providing them with financial protection against potential damages or unpaid rent.
Deposits are not an extra fee or rent; they are a form of security for the landlord. If the property is left in the same condition as when you moved in (barring normal wear and tear), and you’ve fulfilled all the terms of your lease agreement, you’re entitled to get your deposit back.
3 Tips to Get Your Rental Application Approved!
Don’t stress about getting approved for your next dream home. Follow these tips and feel better about your next rental home application.
Review the Lease Agreement
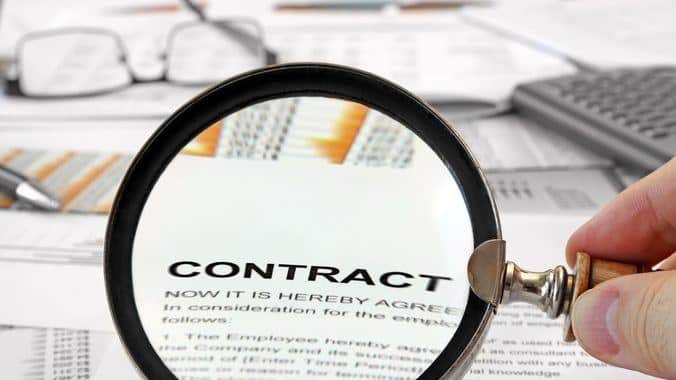
The first step in ensuring you get your deposit back is to thoroughly review your lease agreement. Your lease is a legally binding document that outlines the terms and conditions of your tenancy, including the rules regarding the security deposit. Understanding these terms is crucial to getting your deposit back in full. For example, some leases may require all carpeted areas to be professionally cleaned. Failing to provide the receipt for this could result in a deduction from your deposit.
Your lease should specify:
- The amount of the deposit
- The conditions under which part or all of the deposit may be withheld
- The timeline and method for returning the deposit
- Any additional fees or charges
Make sure to familiarize yourself with these terms and adhere to them strictly. If anything is unclear, don’t hesitate to ask your landlord or property manager for clarification.
Document the Property’s Condition at Move-In
Once you’ve understood the terms of your lease, it’s time to move into the property. However, before you start unpacking, take some time to document the property’s condition. This step is crucial as it provides a baseline against which the property’s condition at the end of your tenancy will be compared. Most leases will require this form to be completed and returned within 7-10 days (sometimes sooner). Don’t wait until the last minute to fill this in.
Here’s how to do it:
- Conduct a thorough walk-through: Go through every room in the property, checking for any existing damage or issues. This includes checking the walls, floors, appliances, fixtures, windows, doors, and outside areas.
- Take photographs and videos: Use a camera to take clear, well-lit photographs and videos of each room and any areas of concern. This visual evidence can be invaluable when disputing potential damage claims from your landlord later.
- Compile a detailed inventory: Write down any damage or issues you observe during your walk-through. Be as specific as possible, describing the location, nature, and extent of each issue.
- Get your landlord’s sign-off: Once your inventory is complete, review it with your landlord. If they agree with your findings, have them sign the inventory. This will confirm that they acknowledge the pre-existing condition of the property.
Maintaining the Property
While living in the property, it’s your responsibility to keep it in good condition. This doesn’t just mean keeping it clean, but also promptly addressing any issues or repairs that arise. Here are some tips to help you do this:
- Regular Cleaning: Keep the property clean and tidy. Regular cleaning prevents the buildup of dirt and grime, which can lead to more significant issues down the line. It also helps you spot and address any new damage or issues promptly.
- Prompt Repairs: If something breaks or becomes damaged, don’t wait to fix it. Whether it’s a leaky faucet, a broken appliance, or a hole in the wall, addressing these issues quickly can prevent further damage and potential deductions from your deposit.
- Avoid Unapproved Changes: Before making any significant changes to the property, like painting the walls or installing new fixtures, get approval from your landlord. Unapproved alterations could result in deductions from your deposit.
- Report Major Issues: If you encounter a significant issue that you can’t fix yourself, like a plumbing problem or a broken appliance, report it to your landlord immediately. It’s their responsibility to address these issues, and prompt reporting can prevent further damage.
- Take Care of the Lawn: If your property has yard space included, be sure to have clear instructions on your duties for maintaining the lawn and garden areas. This is the #1 mistake most renters make and lawn repair can cost thousands.
The Complete Guide to Renters Insurance
Don’t forget your insurance! When moving homes, make sure you update your renters insurance and understand what you’re buying.
Preparing for Move-Out
As your lease term comes to an end, start preparing for your move-out. This is the time to ensure that you’ve fulfilled all your obligations under your lease and that the property is in the same condition as when you moved in. Here are some steps to take:
- Give Notice: Inform your landlord of your intention to move out. Your lease agreement will specify how much notice you need to give, usually 30 or 60 days. Make sure to provide this notice in writing and keep a copy for your records.
- Fix Minor Damages: If you’ve caused any minor damage to the property, try to fix it. This could include touching up paint, or replacing broken fixtures. Remember, the cost of making these repairs yourself is often less than what your landlord might deduct from your deposit.
- Deep Clean: Carry out a thorough cleaning of the property. This should include everything from vacuuming carpets and mopping floors to cleaning appliances and scrubbing bathrooms. If necessary, consider hiring professional cleaners to ensure a thorough job.
- Remove All Personal Belongings: Don’t leave anything behind when you move out. Any items left in the property may need to be removed by your landlord, potentially at a cost that will be deducted from your deposit.
- Return Keys: Make sure to return all keys to your landlord. Failure to do so could result in a charge for replacement keys or changing locks.
The Final Walk-Through
Once you’ve moved out and cleaned the property, arrange for a final walk-through with your landlord if time permits. This is your opportunity to showcase the condition of the property and address any potential concerns. A few tips for the final walk-through include:
- Schedule it After Moving Out: Conduct the walk-through after all your belongings have been removed and the property has been cleaned. This gives your landlord a clear view of the property’s condition.
- Bring Your Move-In Inventory: Have your signed move-in inventory handy to compare the property’s current condition to its condition at move-in.
- Discuss Any Issues: If your landlord points out any damage or cleanliness issues, discuss them openly. If you can address these issues yourself immediately, offer to do so.
Post Move-Out: Getting Your Deposit Back
After moving out, your focus should shift to getting your deposit back. Here are the steps you need to take:
- Provide a Forwarding Address: Give your landlord your new address where they can send your deposit.
- Follow Up: If you don’t receive your deposit within the timeframe specified in your lease or state law (typically 30 days after moving out), follow up with your landlord. Ask for an update and a timeline for when you can expect your deposit.
- Review the Itemized Deductions: If your landlord deducts any amounts from your deposit, they should provide you with an itemized list of these deductions. Review this list carefully. If you disagree with any deductions, discuss them with your landlord or seek legal advice.
Disputing Deposit Deductions
There may be instances where you disagree with your landlord’s deductions from your deposit. If this happens, there are steps you can take to dispute these deductions:
- Provide Documentation: If you’re being charged for damages that were present when you moved in, provide your landlord with the signed move-in inventory and any photos or videos you took.
- Write a Letter: If your landlord is unresponsive or unwilling to discuss the deductions, write a formal letter disputing the deductions. Explain why you believe the deductions are unjust and provide any supporting evidence.
- Seek Legal Advice: If your landlord still refuses to return your disputed deposit, you may need to seek legal advice. Laws regarding security deposits vary by state, so consult a local attorney or tenant’s rights organization.
Protecting Your Deposit: The Key Takeaways
Getting your full deposit back when you move out of a rental property is often a matter of careful planning and diligent maintenance:
- Understand Your Lease: Know the terms and conditions of your lease, including your responsibilities as a tenant.
- Document the Property’s Condition: Conduct a thorough move-in inspection and document any pre-existing damage.
- Maintain the Property: Keep the property clean and in good repair throughout your tenancy.
- Prepare for Move-Out: Towards the end of your lease, begin preparing for your move-out. Fix minor damages, deep clean the property, and remove all your belongings.
- Conduct a Final Walk-Through: After moving out, conduct a final walk-through with your landlord to discuss any potential issues.
- Follow Up on Your Deposit: After moving out, follow up with your landlord about the return of your deposit. If necessary, dispute any unjust deductions.
Remember, the key to getting your full deposit back is to treat the rental property as if it were your own. By respecting the property and your lease agreement, you can ensure that you leave on good terms and with your full deposit in hand.